When it comes to working with sheet metal, having properly sharpened tin snips is essential. Dull snips can lead to rough cuts, jagged edges, and overall inefficient performance. Whether you’re a professional metalworker or a DIY enthusiast, these expert tips and techniques will help you master the art of sharpening your tin snips.
Understanding Tin Snips
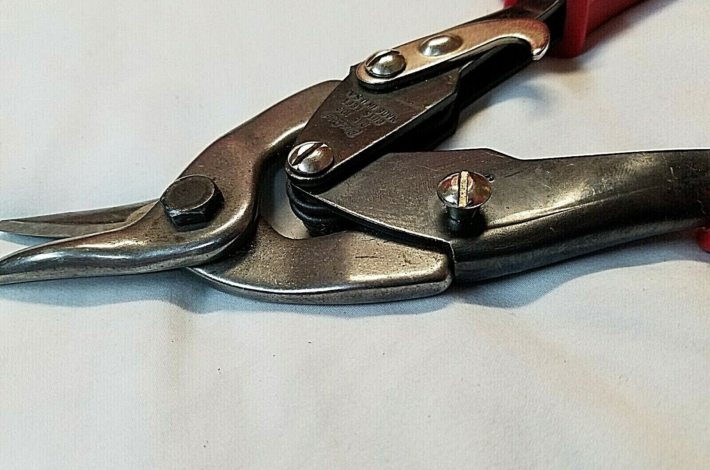
Before diving into the sharpening process, let’s first understand the anatomy of tin snips. Tin snips, also known as aviation snips, are hand tools specifically designed for cutting through thin sheets of metal. They consist of three main parts:
1. Cutting Blades
The cutting blades are the most critical component of tin snips. They are made of hardened steel and come in various shapes: straight-cut, left-cut, and right-cut. Each blade is precisely aligned to deliver optimal cutting performance.
2. Handles
Tin snips have two handles connected by a pivot point. One handle contains a spring mechanism that keeps the blades open when not in use, allowing for easy gripping and precise control during cutting.
3. Pivot Point
The pivot point acts as the fulcrum for the handles and blades. It enables the snips to exert force on the metal being cut, allowing for efficient and effortless cutting.
Why Sharpening Tin Snips is Important
Over time, the cutting blades of tin snips can become dull due to regular use. Dull blades can result in rough and imprecise cuts, requiring more effort and potentially damaging the material being cut. Sharpening your tin snips regularly not only improves their performance but also prolongs their lifespan. It ensures clean and precise cuts, reduces fatigue, and saves time on your metalworking projects.

Tools and Materials You’ll Need
To sharpen your tin snips effectively, gather the following tools and materials:
- Bench Grinder: A bench grinder with a fine-grit grinding wheel is the ideal tool for sharpening tin snips. It provides the speed and precision required for achieving optimal results;
- Safety Gear: Wear safety goggles and protective gloves to shield yourself from sparks and sharp edges while sharpening your tin snips;
- Oil or Lubricant: Use a lubricating oil or spray specifically designed for metalworking to prevent overheating and ensure smooth operation during the sharpening process;
- Cleaning Cloth: Keep a clean cloth handy to wipe away any metal shavings or debris during and after sharpening;
- Sharpening Stone: If a bench grinder is not available, you can use a sharpening stone with a fine grit as an alternative.
Now that you have the necessary tools, let’s proceed to the step-by-step process of sharpening your tin snips.
Step 1: Safety First
Before starting the sharpening process, ensure you are working in a well-ventilated area with sufficient lighting. Put on your safety goggles and protective gloves to prevent any potential injuries.
Step 2: Inspect the Blades
Examine the cutting blades of your tin snips for any signs of wear, chips, or nicks. If the blades are severely damaged, it may be necessary to replace them entirely. However, minor imperfections can usually be resolved through sharpening.
Step 3: Prepare the Bench Grinder
If you’re using a bench grinder, make sure it is securely mounted on a workbench. Adjust the tool rest to achieve the desired angle for sharpening, typically around 20 to 30 degrees.
Step 4: Lubricate the Snips
Apply a small amount of lubricating oil or spray to the pivot point and cutting blades of your tin snips. This helps reduce friction and heat buildup during the sharpening process.
Step 5: Grinding the Blades
Hold the tin snips securely and position the cutting blades against the grinding wheel of the bench grinder. Maintain a consistent angle and apply gentle pressure as you move the snips back and forth across the wheel. Avoid overheating the blades by dipping them in water intermittently during the sharpening process.
Step 6: Check the Sharpness
Periodically pause the sharpening process to check the sharpness of the blades. Carefully touch the cutting edges with your fingertips, ensuring they are uniformly sharp. If needed, continue grinding until the desired sharpness is achieved.
Step 7: Clean and Test
Once you are satisfied with the sharpness of the blades, wipe away any metal shavings or debris using a clean cloth. Test the snips by making a few test cuts on a piece of scrap metal. If the cuts are clean and effortless, your tin snips are ready for use.

Proper Maintenance for Longevity
To ensure the longevity and optimal performance of your tin snips, proper maintenance is crucial. Follow these maintenance tips to keep your snips in excellent condition:
Clean after Each Use
After each use, clean your tin snips thoroughly to remove any debris or metal shavings. Wipe the blades and handles with a clean cloth, ensuring there is no residue left behind.
Lubricate Regularly
Apply a thin layer of lubricating oil to the pivot point and cutting blades to prevent rust and promote smooth operation. Use a rust-preventive oil or a metalworking lubricant for this purpose.
Store Properly
When not in use, store your tin snips in a dry place to prevent moisture and humidity from causing rust. Consider using a tool pouch or hanging them on a pegboard to keep them organized and easily accessible.
Check for Wear and Damage
Regularly inspect your tin snips for any signs of wear, chips, or nicks on the cutting blades. If you notice any damage, address it promptly to prevent further deterioration and ensure optimal cutting performance.
Troubleshooting Common Issues
While sharpening your tin snips, you may encounter certain issues that can affect the cutting performance. Here are some common problems and their solutions:
1. Uneven Cutting
If you notice that your tin snips are cutting unevenly, it could be due to misaligned blades. Inspect the blades and ensure they are properly aligned. If misalignment is detected, adjust the pivot point to realign the blades. This will result in more consistent and even cuts.
2. Blades Sticking or Jamming
Blades that stick or jam during cutting can hinder your progress and damage the material. To address this issue, apply a few drops of lubricating oil to the pivot point and blades. The lubrication will reduce friction and ensure smooth cutting motion. Clean the blades regularly to prevent the buildup of debris that can cause sticking.
3. Excessive Force Required
If you find yourself exerting excessive force while cutting, it’s a sign that your tin snips need sharpening. Dull blades require more effort to cut through the material. Follow the sharpening process outlined earlier in this guide to restore the sharpness of your snips. Sharp blades will make cutting easier and more efficient.
4. Rough or Jagged Cuts
Rough or jagged cuts can occur when the blades are dull or damaged. Sharpening the blades to restore their sharpness will help eliminate this issue. Additionally, ensure that you maintain a steady cutting motion and apply consistent pressure to achieve clean and precise cuts.

Conclusion
Sharpening tin snips is a valuable skill that every metalworker and DIY enthusiast should possess. By following the step-by-step guide outlined above, you can ensure your tin snips remain sharp, reliable, and capable of delivering precise cuts. Remember to perform regular maintenance and sharpening to extend the lifespan of your snips and enhance your overall metalworking experience.